When speaking of modern development nowadays, we can hear words like DevOps and as part of that, Continuous Integration (if you never heard about it, you can read more about it here). Anyways, today I am going to show you how to set up a build definition for a PHP project stored in Visual Studio Team Services and then the publication to an Azure Web App or a physical server.
Let's take a look into what the build process can consist of: The first step, which is the same for most projects in various languages, would be to fetch the dependencies and packages. For a PHP application, this is most commonly achieved using Composer. If your application is front-end oriented, you may also need to download JavaScript packages from NPM or eventually run some Grunt or Gulp tasks. After that, you might want to run the tests (because who tests their code nowadays anyways, right? :)). And if everything goes well, publish the built project into Artifacts so it can be accessed from VSTS and then also deploy it to your staging servers, may it be Azure Web Apps, Virtual Machine (both Windows and Linux) running on Azure, Amazon Web Services, Google Cloud or even on-prem!
So far so good, right? Assuming you have a VSTS workspace created and already have some code in there (if not, head here and sign up for one!), let's take a look at how to set this up, step by step:
Build Agent
The core part of the build process itself is a build agent. Visual Studio Team Services offers a hosted build agent which can do the job for Node.js, ASP.NET and many other projects, however it doesn't contain Composer or PHP runtime (but it contains a lot of other cool tools), so we will have to go and create our own (and it isn't as hard as it sounds!).
Build Agent is practically a virtual machine (or a physical build machine) which receives the build task and processes the pipeline you define in the build definition.
Update (08AUG2018): After revisiting this article, I would like to add that it is now possible to use the hosted pipelines for building PHP as well thanks to the Docker integration. Simply pick or build your own PHP image which contains all the necessary things (PHP vX.X, Composer, NPM, Gulp, Grunt, etc.) and then just use it to build and publish the artifacts.
Okay, virtual machine, which OS to choose?
You would be usually choosing the OS type based on the environment where the application will be running. For Azure Web Apps or Windows machine, you will want to use Windows build agent, and for target environment with Linux or App Service on Linux you will want to do this on Linux. Just for explanation, I believe this is the best practice because when using for example Node.js packages, some of the native packages must be compiled and you just cannot take a native package built for Linux and run it on Windows. Also, and this is probably more important, when running unit tests, you want to run them in the same setup environment as production.
Protip: Also if you are going to use Azure Virtual Machines for your build agent, you will appreciate the ability to use Startup and Shutdown policies with Dev/Test labs to save a money when using a monster build agent (with setup where you use periodic builds). Additionally, you could make use of Azure Functions and set it up so the virtual machine with build agent starts when you commit to a repo and then triggers the build task after starting.
Setting it up
So in my case, I will be deploying my application to a Windows-based hosting (of course it is Azure App Service, but I will also show other options). So I need to setup Windows Server. I chose a VM in Azure, but it could be just anywhere, even on my PC in Hyper-V. To create a machine in Azure, you can find the tutorial here - I chose Windows Server 2016, just for the sake that I didn't get to play with it much.
Once my VM is up and running, you need to connect to it through the Remote Desktop and start setting up the environment:
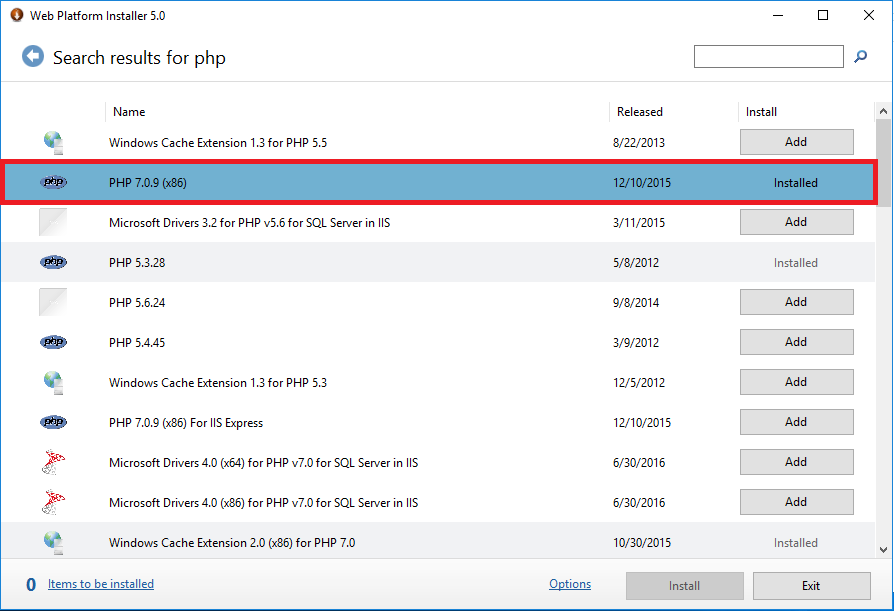
You may want to install PHP runtime in first place. You can achieve that using Web Platform Installer or just by downloading the binaries (or compiling your own if you are hardcore enough) and adding the folder into your PATH. I chose to install PHP 7.0 (the latest stable available atm).
Next thing you are definitely going to need is Composer. You can install it from the command line or using an installer for Windows which sets it up for you. Make sure it is available from the command line.
You also need to have Node.js runtime installed. This is because of two reasons: if you ever need NPM or run some Tasks for your code, it will come in handy and secondly because the VSTS build tasks are written in Node.js (cool, right?).
If you plan to deploy into Azure Web Apps, installing Web Deploy might come in handy.
The last step would be to setup the build agent connection. Microsoft's docs have a great tutorial on how to do this on Windows, Linux and Mac.
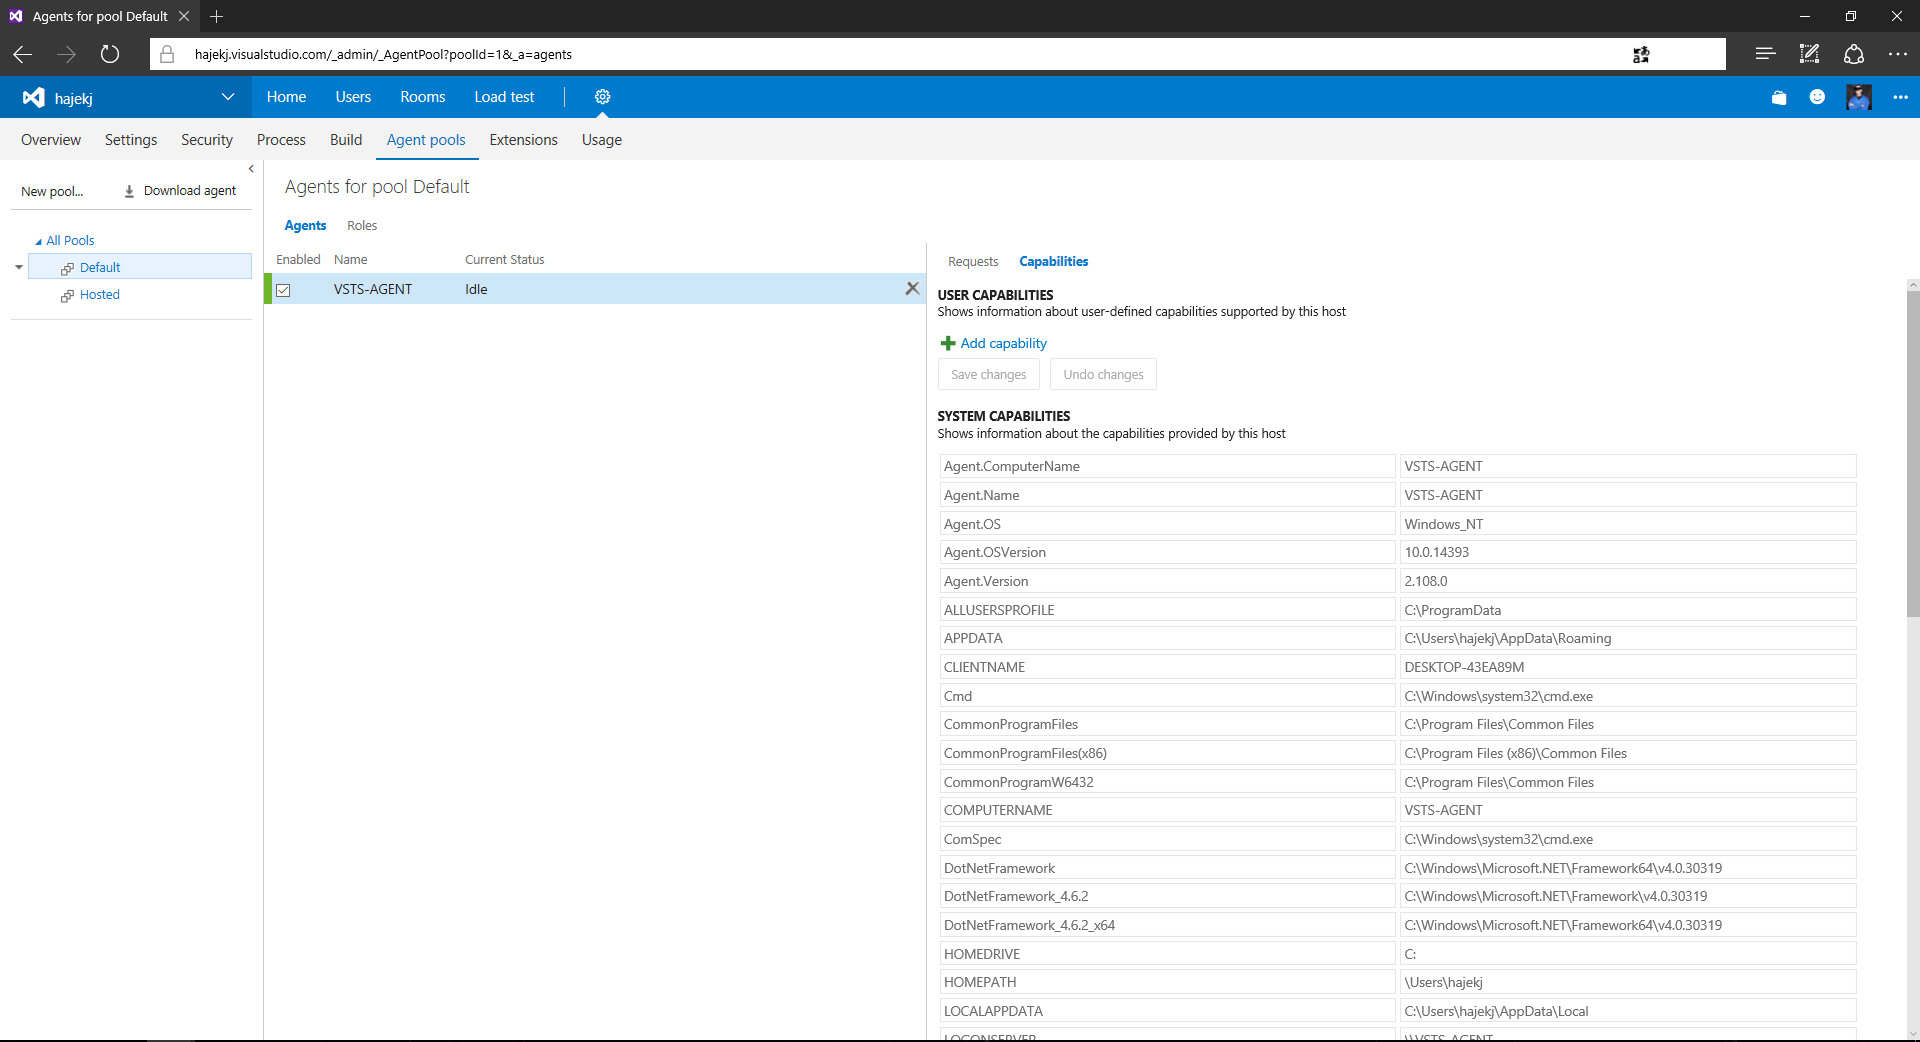
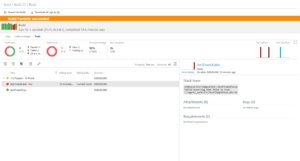
Upon successful configuration, the agent will appear in the Agent pools section of VSTS like so:
Since the VSTS agent doesn't automatically detect PHP and Composer, it is also useful to add it into capabilities, so if you have multiple build agents, in a pool, it will be easier to run the build task only on a pool of agents which have PHP and Composer or PHP7 etc.
So now we have the build agent setup, lets move onto creating the Build Definition.
Build Definition
Build definition defines the build process step-by-step. We are going to start from an empty definition. VSTS contains a lot of very useful predefined steps which we are going to make use of.
VSTS is automatically going to automatically create a temporary project folder, where the code is going to be pulled (and do it on every build), so the first thing we need to do is to get the packages from Composer.
Composer
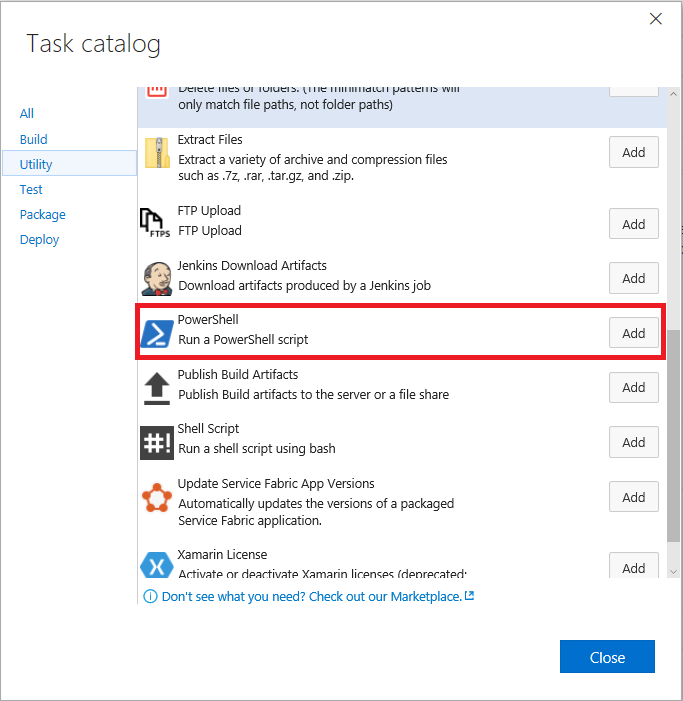
Since there is no such thing predefined in the default steps or the marketplace, we will need to create our own script. On Windows, I really like PowerShell, so I created a new PowerShell step:
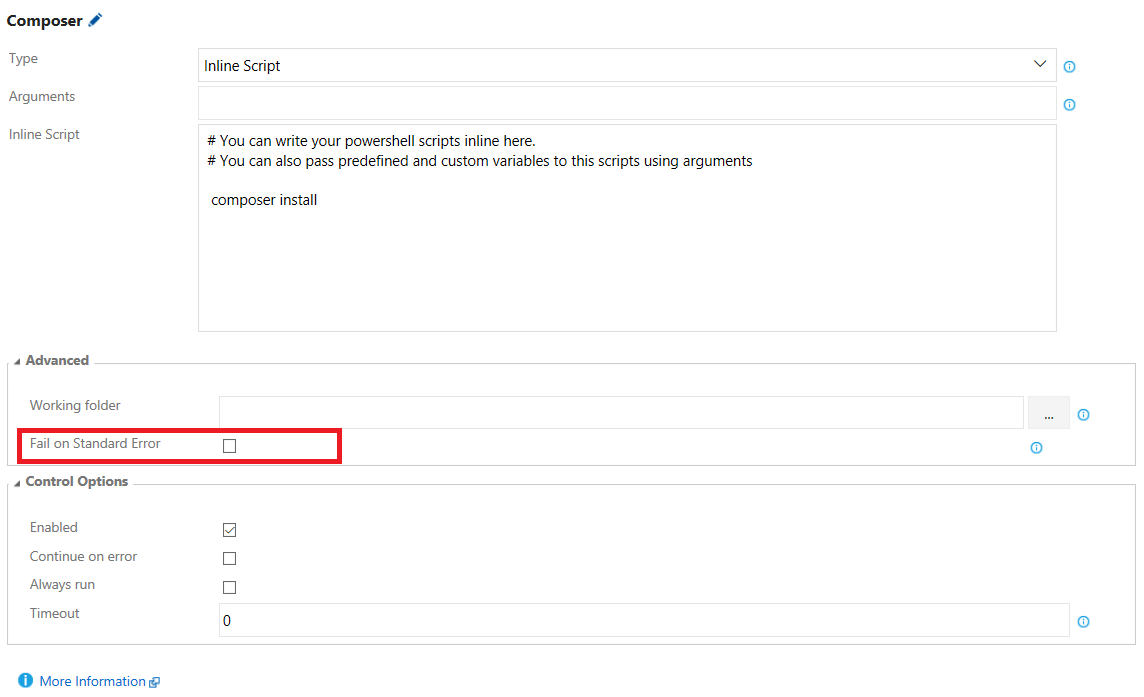
And then add the code to be executed. Make sure it is set as Inline Script, which will allow you to write it directly in the build step. The contents of the script will be like so:
# You can write your powershell scripts inline here. # You can also pass predefined and custom variables to this scripts using argumentscomposerinstall
Next, you need to tweak the script settings a bit - since Composer seems to be sending debug messages to stderr (for example #4034) and it seems to be expected behavior, you have to uncheck Fail on standard error option in the Advanced section, else your build will constantly fail. No worries, if an actual error happens, like a package fails to download, the build task will fail, because Composer will exit with an error code.
Now the project will contain the packages from Composer, we could do similar for fetching NPM packages or running Grunt tasks with the difference that these tasks are already created and you don't have to execute them manually.
Next up, running tests.
PHPUnit
Once again, PHPUnit doesn't have predefined tasks either, so we have to manually execute it using command line. I actually discovered few issues with PHPUnit's test results, but I will explain it throughout this part.
Anyways, once again we need to create a new command line task which will be an inline script. I will paste the contents below and explain it afterwards:
Alrighty, so first off we simply run phpunit command. For it to run successfully, you need to have a phpunit.xml definition existing in the project root. Example of such definition would be:
This is going to tell PHPUnit to run all tests within Test directory and store the results into JUnit compatible xml file. However as it turns out, PHPUnit's JUnit compatible file isn't really JUnit compatible (funny, right?). Hence the second part of the PowerShell script, which transforms the PHPUnit generated XML into JUnit compatible XML (you can read more about it here or here). In order to transform the PHPUnit file we need to create an XSL Transform file with following contents:
I chose to store it into Test folder under phpunit2junit.xsl name.
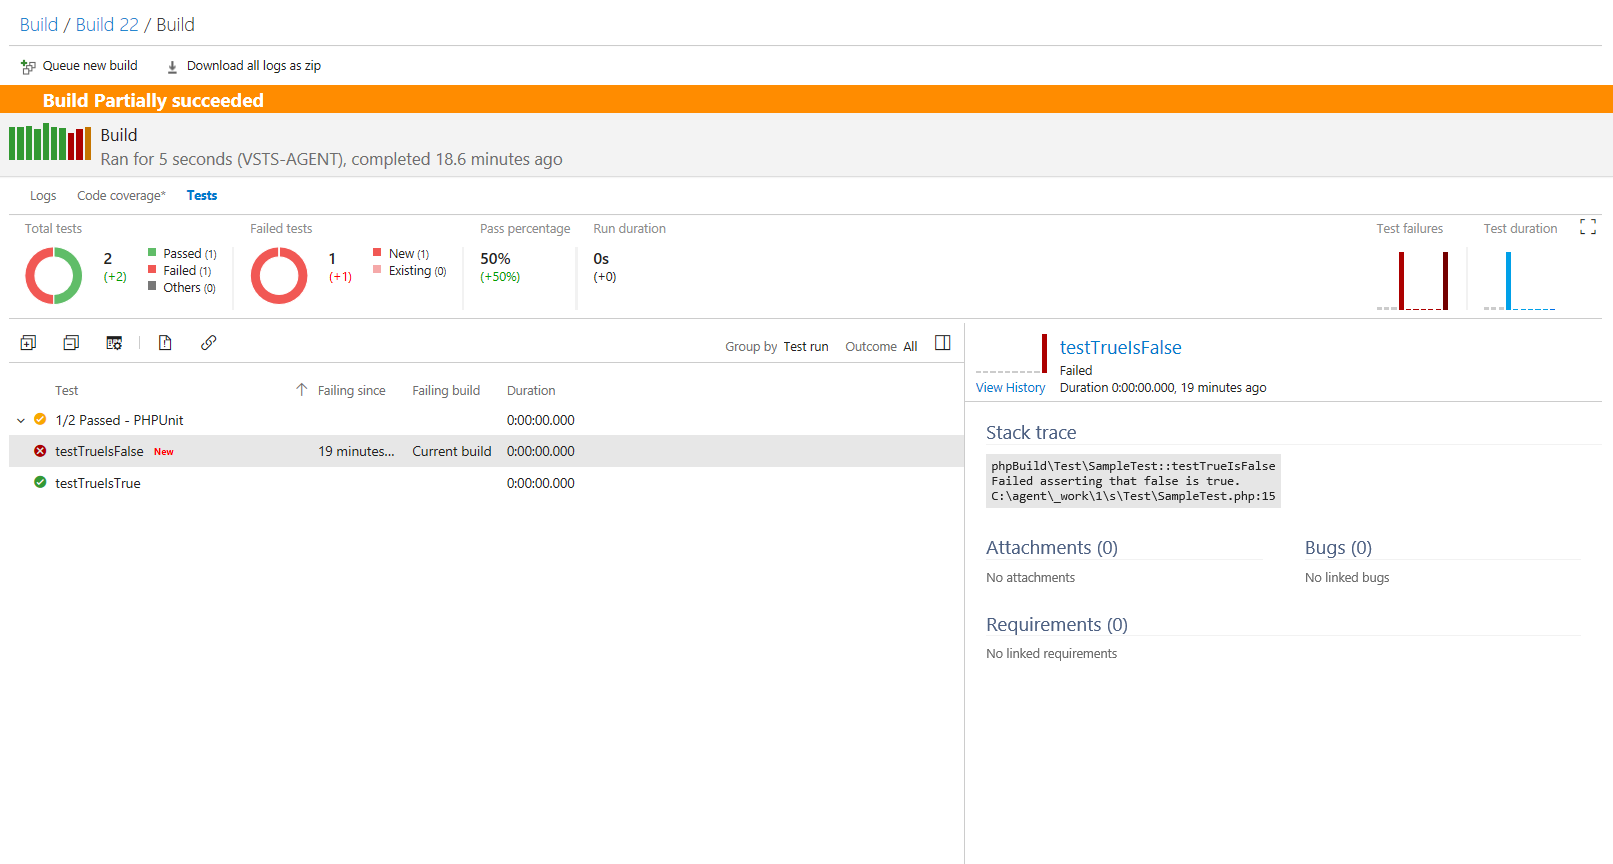
Once this is set up, all you have to do is to create a Task which will collect and upload the test results to VSTS. From the task selection we add Publish Test Results task (can be found under Test category). And we configure it for the JUnit test format and give it the path of where the file will be stored (in my case it was Test\Logs\junit-fixed.xml).
Now we have the PHPUnit configured and test results are going to show up in VSTS with each build. Thanks to it, we could also choose to automatically create bugs whenever a test fails and so on.
Publishing
The last part is to publish the project. In this case, we are going to publish the artifacts to VSTS first and then publish the project to our server.
Publishing artifacts
This step is optional, what it does is that it takes the built project and publishes it to VSTS or some sort of share. You would for example configure this so your built project is available from the VSTS to QA team who may want to deploy it manually or so. You would also use these to store some extra logs, screenshots or any other files in general.
Publishing to Azure Web App
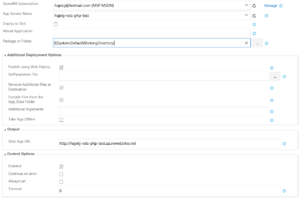
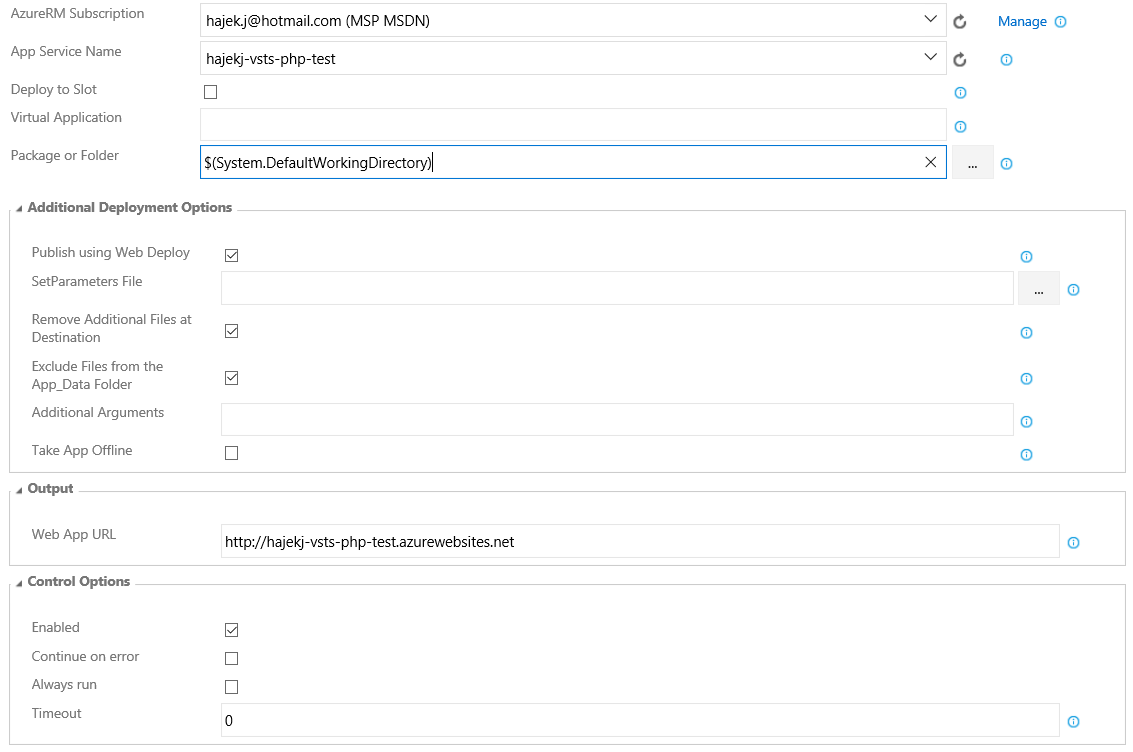
In order to publish the project into App Service, all you have to do is to add the build task called Deploy AzureRM App Service, connect it to your Azure Subscription, choose the website to deploy to, optionally a deployment slot and you are good to go!
Wrap-up
So now we have setup a basic DevOps cycle with deployment to Azure Web Apps using VSTS, ain't it cool? Additionally, you could just choose to deploy the application to an IIS enabled server like a VM or an on-prem one, or deploy your project on a Linux server using SSH file copy! The great thing is that these build tasks are already ready for you!
Another practical use could be building WordPress plugins. Especially the packaging and publishing part can be pain in some cases - like when using Composer packages in your plugin. Eventually, the entire Subversion part of publishing could be just hidden into one of the build tasks.
VSTS vs. App Service custom deployment
You might have heard that Azure App Service already supports customizable deployment by using your own deployment scripts, which are also really powerful and do the job for very simple applications (even the Composer extension leverages it). But say, you need to run the unit tests or you would like to use Composer with App Service on Linux - VSTS is your best friend. And thanks to the ability to have a custom build agent, you can chain any tool into the build process.
Marketplace extension
I am actually thinking about making an extension for Composer into the VSTS Marketplace which would remove the need of creating a custom build agent (at least for Windows).
[…] This brings a challenge with deployment – when you push new change to source control, the changes will be deployed, however the instances won’t pick it up unless you restart the site. So how to automate this, so you can do this in a single push? The answer is simple – make use of Visual Studio Team Services and just add the site restart as final deployment step in the build definition. You can find out more about those in my previous article about PHP and DevOps with VSTS. […]
alextech
Thank you, especially for the PHPUnit to JUnity convertion XSL template. I was about to spend time making my own parser. You saved me some trouble. Glad others in OSS and PHP find TFS all in one workflow valuable.
Thanks for this post. This help me to understand some concepts.
I have to integrate CI/CD to PHP app which is deployed to VMSS (Linux). What build process should I build for to that ?
So you would probably be best off with building a Docker container and then deploying the container to your machines. You can either handle the deployment manually or setup some orchestrator like Kubernetes (or even used Azure Container Service - AKS, as a managed container platform which can run both Linux and Windows, and also uses Scale Sets).
If you have a Scale Set deployed, do the machines have connection to some shared storage? Like Azure Files or each of the machine is independent?
We also first through of using containers but ACS or AKS still doesn’t support to deploy to existing Vnet, ACS & AKS use 10.0.0.0/8 witch is conflict with on prem IP range. It Deployed using managed disk. Not using any storage accounts.
[…] article about building your custom container for ASL, and with slight modifications, you could also leverage VSTS and automate the Composer tasks into the container build process as […]
I haven’t seen many developers debug plugins in Dataverse. Since Dataverse runs in cloud, you can’t just attach debugger to the remote server like you would ...
I am a heavy user of Remote Desktop. I connect to my work computer from my MacBook for coding, debugging, doing demos, sometimes even gaming. In some cases, ...
Dataverse has very powerful auditing, however, if you are running a larger system, you may quickly run out of log storage which will then start consuming you...
I have been using Cloudflare since 2011 for DNS, caching and protection. In 2014 Cloudflare introduced Universal SSL helping enable HTTPS for millions of fre...


Comments
Speed up your application in Azure App Service – Honza's Blarg
[…] This brings a challenge with deployment – when you push new change to source control, the changes will be deployed, however the instances won’t pick it up unless you restart the site. So how to automate this, so you can do this in a single push? The answer is simple – make use of Visual Studio Team Services and just add the site restart as final deployment step in the build definition. You can find out more about those in my previous article about PHP and DevOps with VSTS. […]
alextech
Thank you, especially for the PHPUnit to JUnity convertion XSL template. I was about to spend time making my own parser. You saved me some trouble. Glad others in OSS and PHP find TFS all in one workflow valuable.
Kasun Rajapakse
Hi
Thanks for this post. This help me to understand some concepts. I have to integrate CI/CD to PHP app which is deployed to VMSS (Linux). What build process should I build for to that ?
Jan Hajek
So you would probably be best off with building a Docker container and then deploying the container to your machines. You can either handle the deployment manually or setup some orchestrator like Kubernetes (or even used Azure Container Service - AKS, as a managed container platform which can run both Linux and Windows, and also uses Scale Sets). If you have a Scale Set deployed, do the machines have connection to some shared storage? Like Azure Files or each of the machine is independent?
Kasun Rajapakse
We also first through of using containers but ACS or AKS still doesn’t support to deploy to existing Vnet, ACS & AKS use 10.0.0.0/8 witch is conflict with on prem IP range. It Deployed using managed disk. Not using any storage accounts.
Deploying PHP web applications to Azure App Service – Honza's Blarg
[…] article about building your custom container for ASL, and with slight modifications, you could also leverage VSTS and automate the Composer tasks into the container build process as […]
To submit comments, go to GitHub Discussions.